Grid Reference
Teaching Demonstration
The following demonstration shows the teaching procedures of Grid Reference by using ARGEO Portable.
Select “Map A” in “Preset Terrain
 ”.
”.Apply the “Map view
 ”. The grid lines are shown on the map.
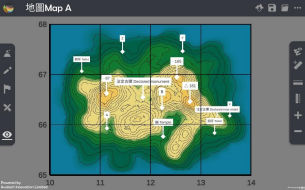
Press the grid line value. Set the starting point of northings is 10 and that of eastings is 65. (Teacher can customise the grid line values.)
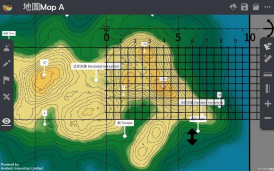
Find the six-figure grid reference of point B.
Method 1
Place the ruler on the grid square. Count the grids from left to right, then from bottom to top (The first grid is 0 and the last grid is 9). Take the readings to form six-figure grid reference.
Method 2
Press the “Horizontal ruler
 ” button. Place the ruler on the point B and make it parallel to the northings.
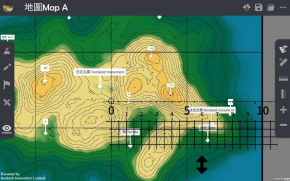
Each grid equals to 0.5 cm. The first grid is 0 and the last grid is 9. Take the reading of easting.
Press the “Vertical ruler
 ” button. Place the ruler on the point B and make it parallel to the eastings.

Each grid equals to 0.5 cm. The first grid is 0 and the last grid is 9. Take the reading of northing.

Combine the easting and northing readings to form a six-figure grid reference
下載教學資源
Teaching Demonstration Download Here
工作紙及答案(中文版) Download Here
工作紙及答案(英文版) Download Here